Sunday 10 September 2017

How to Edit Build.prop Without Root using ADB in TWRP recovery

BY SMART YOO

If you’ve ever dived into customizing your Android device beyond the means of apps from the Play Store, you might have come across editing build.prop file. It’s located in the /system directory of your device.
What’s build.prop file?
You might wonder what does build.prop file does, and why is it so important for the OS installed on your device. Well, build.prop file contains information about system properties and other critical build information which is used system-wide on an Android device.

Strings and values defined under build.prop file are critical to the OS, as they define what features are to be enabled on the device. By editing build.prop file, you can create or modify system properties which are then loaded when your device reboots.

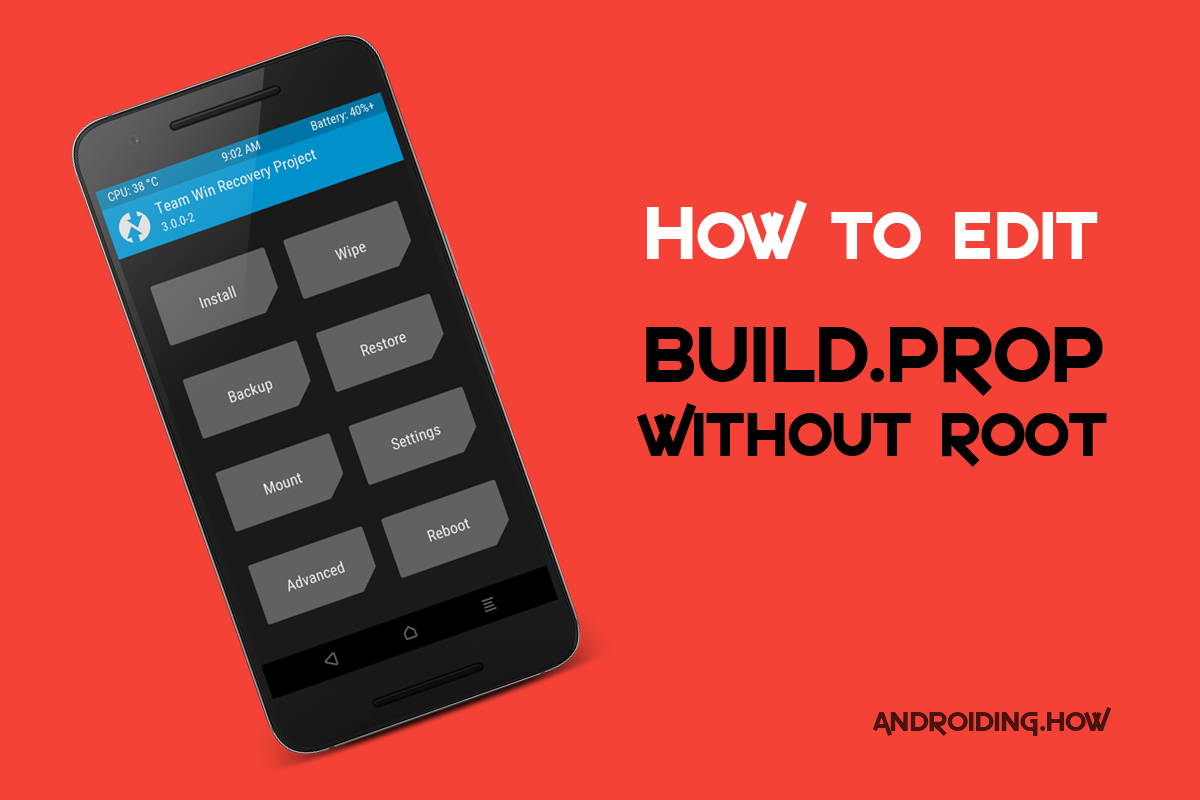
We recently did a post on How to Edit Build.prop file on Android using a build.prop editor app from the Play Store, which requires root access. But if you don’t wish to or can’t root your Android device but can boot a custom recovery like TWRP onto it, then also you can edit the build.prop without root.
A custom recovery comes with full root access, and ability to setup a ADB connection to modify/change files on the system partition of your Android device. Hence, you can use a custom recovery to edit build.prop file without rooting your device.
For help installing TWRP recovery on your device follow TWRP installation help pages for Fastboot and Odin flashable TWRP images.
Note: If you’re a novice user, it’s advisable that you do not edit the build.prop file values based on your own knowledge. Make sure the system values you’re looking to edit in build.prop file are coming from an expert/knowledgeable Android user. Else, you might end up with a soft-bricking your Android device.

How to Edit Build.prop Without Rooting your device

  1. Setup ADB and Fastboot on your PC.
  2. Boot your Android device into TWRP recovery.
  3. Select Mount » and then select System from the list of partitions to mount the system partition and then go back.
  4. Connect your device to the PC with an authentic USB cable.
  5. Open a command window on the PC and issue the following command to pull build.prop file from the device:
    adb pull /system/build.prop
  6. The above command will download the build.prop file to your PC in the same directory where your command prompt is running from.
    └ Tip: Make a copy of the build.prop file before you edit it so that you’ve a backup of the original file.
  7. Download and install Notepad++ software on your PC.
  8. Open the build.prop file on your PC using the Notepad++ program.
  9. Edit the build.prop file as per your requirement and save it on the PC after making the changes.
  10. Once you’ve saved the edits to the build.prop file, push it back to the device using the following command:
    adb push build.prop /system/
  11. Now set the correct permissions for the build.prop file with following commands (issue them one-by-one):
    adb shell
    cd system
    chmod 644 build.prop
  12. Once you’ve set the correct permission for build.prop file, reboot your device to system from TWRP’s Reboot » System option.
  13. That’s it. You’ve now successfully edited build.prop without root on your Android device.


Thursday 7 September 2017

5 Ways to Clear Memory & Increase RAM on Your Windows Computer

BY SMART YOO


RAM (random access memory), the final frontier. You’ve been with us since the PC’s invention and you always seem to run out on us. Sometimes, you even cause problems that go unnoticed until you make everything come crashing down.


Internal memory has come a long way, though. We’ll show you how you can free up memory and extend your RAM, both virtually and physically.

Run ReadyBoost

Microsoft’s ReadyBoost feature takes advantage of the fact that flash storage is about as quick as RAM. Introduced with Windows Vista, ReadyBoost requires a USB drive that offers at least

  • 256 megabytes of storage,
  • access times of 1 millisecond or less,
  • a read speed of 2.5 megabytes per second for 4KB random reads, along with
  • a write speed of 1.75 megabytes per second for 512KB random rights.
While the requirements were a bit intimidating at release, modern USB drives can meet these specifications with ease.
You can enable ReadyBoost by right-clicking your USB drive in My Computer, opening Properties, and then navigating to the ReadyBoost tab. You’ll see several radio buttons that let you enable or disable the feature as well as a slider that lets you dictate how much of the drive’s capacity is devoted to the feature. The ceiling is four gigabytes, if you use FAT32 formatting on the drive, but formatting with NTFS ups the ceiling to 32GB.
readyboost

Enabling ReadyBoost isn’t as beneficial as installing more RAM, but it does provide some performance improvement. In some cases it can decrease load times by up to 75%. You’re most likely to see a noticeable improvement if you have very little RAM (say, two gigabytes or less) and a relatively slow mechanical hard drive. Windows disables this feature if you have an internal solid state drive because it offers superior storage performance.

Use Windows Task Manager & Resource Monitor

The easiest way to free up RAM in use is to open Windows Task Manager. Navigate to the Processes tab and then sort the list of open programs by memory. This will reveal any process that’s consuming an unusually large volume of RAM.
You can see even more information by going to the Performance tab, opening Resource Monitor, and then navigating to its Memory tab. In this view, you’ll see the information found in Windows Task Manager and a graph that breaks down how your system is currently allocating RAM.
resourcemonitor
Don’t be alarmed if you see some significant RAM allocation. You should, if you’re running Windows Vista or later. Memory management in Vista and later versions of Windows is more aggressive, which means the OS eagerly retains data in memory that may be useful in the future. You should only be concerned if Resource Monitor consistently shows more than three-quarters of your RAM as “In Use,” as that’s a good indication there’s no enough to go around.

Disable or Remove Unnecessary Software

As you navigate Windows Task Manager and Resource Monitor, you may notice some programs that are consistently a problem, yet restart themselves whenever your system boots. Dropbox, for example, consumes about 85MB of memory on my PC, but I only use it once in a blue moon. Running it 24/7 doesn’t make a lot of sense.
msconfig
You can uninstall an offending program, of course, but it’s more likely you’ll want to prevent it from running when your system boots. We’ve already published several articles, so instead of repeating that information, I’ll direct you to Saikat’s article on how to troubleshoot system issues with MSconfig and Aaron’s list of 10 non-essential startup programs you can disable.

Install a RAM Cleaner

If tracking down offending programs feels like chasing your tail, or you’re just not familiar with Windows Task Manager, you can try installing a program that “cleans” your RAM. These programs basically go on a hunt for programs that are consuming memory and shut off their access, freeing that memory up for other uses. Some of the better examples we’ve tested over the years include CleanmenMinimem and Super Memory Cleaner (for Mac).

cleanmem
Be warned, though, that these tools are controversial. While some users have reported success, others have failed to see an improvement with a so-called cleaning. I personally am among the latter number; though, to be fair, I haven’t had shortage of memory in some time.
You should also be careful to vet the reviews of any RAM cleaner you consider grabbing, because malware apps sometimes masquerade as RAM cleaning or optimization tools. Double-check that you’re downloading a legitimate app from its official website.

Add More RAM

While the techniques already listed can help solve your memory woes, there will inevitably come a time where the normal solutions don’t work. RAM is a limited resource and there’s only so much you can do to stretch the gigabytes you have available.
isntallram
You first need to identify what kind of RAM your computer uses. This can be made easy by downloading a system specification tool like CPU-Z that informs you what’s installed in your desktop or laptop. However, you may also need to open your system and examine what free slots you have available, if any. If you have free slots you can simply buy more to add to what you already have, but if all slots are filled, you’ll need to replacements that offer more capacity per DIMM.


Once you’ve grabbed the new memory, you can learn to install it by checking out the very helpful installation videos made available by Crucial, a company that sells RAM and solid state storage. Laptop users can also refer to our upgrade guide, which will take you through the process step-by-step.

Never Run Out of Memory Again!

See, RAM? You’re not such a trouble-maker after all. Sure, you cause problems every now and again, but it’s easy enough to resolve them – and often the biggest problem of all is having too little of you! I’m glad we were able to work this out, RAM. I think things are going to be okay.
How much RAM do you need to be happy?


Unlock up to 64GB of RAM on 32-bit Windows With PAE Patch

BY SMART YOO


Still using a 32-bit Windows machine? Here’s how to remove the 4GB limit that might be hampering your RAM usage.
While 32-bit was once the standard, in recent years more and more Windows users have migrated to the 64-bit version of the OS. However, there are still some holdouts using 32-bit systems — and they might well be missing out on some of the potential of their hardware if they haven’t addressed a known issue with RAM on that sort of machine.
Fortunately, there’s a relatively simple solution to the problem, so long as you’re comfortable using the command line interface to make the necessary tweaks. Here’s all you need to know about patching your 32-bit system so you can take advantage of up to 64GB of RAM installed on your computer.

Why Am I Limited to 4GB of RAM?

The reason behind the so-called ‘3GB barrier’ lies in the architecture of 32-bit operating systems. Each individual byte of RAM has its own physical address that the system uses to access particular units of memory. 32-bit systems have a limit on the amount of addresses available for RAM and various other components. Depending on your setup, this can limit the amount of RAM your system can support to somewhere around 3GB — although it could be slightly higher or slightly lower.
A technique called physical address extension, or PAE, can allow a 32-bit OS to support up to 64GB of RAM. By increasing the physical address size from 32 bits to 36, there are plenty more addresses available for the system to use — but the system’s virtual addresses stay the same, ensuring that everything works just as it should.

How Can I Tell If I Need PAE?

Whether or not you need to utilize PAE will come down to two important factors; are you running a 32-bit or 64-bit version of Windows, and how much of your installed RAM is usable? To establish both, open up Control Panel, and navigate to System and Security > System.

system
If you see something similar to the above, then you’re already sorted. However, if the System typereads 32-bit Operating System and there’s a bracketed entry stipulating how much of your RAM is usable, following the result given for Installed memory, you’ll need to make use of PAE in order to get the full effect of your RAM.

One more thing to consider before you go ahead with this process is that PAE has been reported as having some difficulties working with NVIDIA graphics cards in the past. If that’s the case with your rig, it’s perhaps worth considering upgrading to a 64-bit system outright.

How to Enable PAE on Windows 7 and Windows 8

First things first, download PatchPae2 from wj32. This will give you a .zip file containing a patch that will work for machines running either Windows 7 or Windows 8/8.1, but there’s a few slight differences between the processes for versions of the OS pre- and post- Windows 8. Start by unzipping the file you downloaded and placing it in a folder inside Windows > System32, which will likely be found on your computer’s C: drive. Once PatchPae2.exe is in place, make a note of its file path, as you’ll need this later on.
Now, open a Command Prompt with Administrator privileges enabled. You can do this easily by searching your system for Command Prompt, and then right-clicking the correct entry in the search results and choosing to Run as Administrator. You should be presented with the standard command line interface — ensure that the directory reads system32.
commandline
If you’re using Windows 8 or later, now it’s time to run the command PatchPae2.exe -type kernel -o ntoskrnx.exe ntoskrnl.exe, which should look like this.

patchpae
If you’re using a version of Windows older than Windows 8, you’ll need to do the same, but with a slightly different list of instructions following the file’s location. In place of -type kernel -o ntoskrnx.exe ntoskrnl.exe, instead input  -type kernel -o ntkrnlpx.exe ntkrnlpa.exe.


Next, patch the loader to disable digital signature verification by entering the command PatchPae2.exe -type loader -o winloadp.exe winload.exe. Then, create a new boot option with the following input: bcdedit /copy {current} /d “Windows (PAE Patched)”. The phrase between the quotation marks is simply a comment for you to label what you’ve done.
You should see a message that tells you that the copy was successful, and gives you a unique boot ID in the format {xxxxxxxx-xxxx-xxxx-xxxx-xxxxxxxxxxxx}. Copy that ID, because we’re going to use it for the next few commands. Enter bcdedit /set {boot ID} kernel ntoskrnx.exe if you’re using Windows 8 or 8.1, and bcdedit /set {boot ID} kernel ntkrnlpx.exe for anything earlier.
bootid
There are just a few more commands that we need to run. First, make sure our patched loader is selected by inputting bcdedit /set {boot ID} path \Windows\system32\winloadp.exeThen, use bcdedit /set {boot ID} nointegritychecks 1 to confirm that the loader shouldn’t be verified. Then, set this boot entry as the default with bcdedit /set {bootmgr} default {boot ID}. You can also use bcdedit /set {bootmgr} timeout X to set a custom boot menu display time by replacing X with your desired length of time in seconds, but this is optional. All that’s left from this point is to restart your computer.
Have you used PAE to free your computer from its limited RAM usage? Let us know about your experiences — and any tips that you might have — in the comments section below.


Next, patch the loader to disable digital signature verification by entering the command PatchPae2.exe -type loader -o winloadp.exe winload.exe. Then, create a new boot option with the following input: bcdedit /copy {current} /d “Windows (PAE Patched)”. The phrase between the quotation marks is simply a comment for you to label what you’ve done.
You should see a message that tells you that the copy was successful, and gives you a unique boot ID in the format {xxxxxxxx-xxxx-xxxx-xxxx-xxxxxxxxxxxx}. Copy that ID, because we’re going to use it for the next few commands. Enter bcdedit /set {boot ID} kernel ntoskrnx.exe if you’re using Windows 8 or 8.1, and bcdedit /set {boot ID} kernel ntkrnlpx.exe for anything earlier.
bootid
There are just a few more commands that we need to run. First, make sure our patched loader is selected by inputting bcdedit /set {boot ID} path \Windows\system32\winloadp.exeThen, use bcdedit /set {boot ID} nointegritychecks 1 to confirm that the loader shouldn’t be verified. Then, set this boot entry as the default with bcdedit /set {bootmgr} default {boot ID}. You can also use bcdedit /set {bootmgr} timeout X to set a custom boot menu display time by replacing X with your desired length of time in seconds, but this is optional. All that’s left from this point is to restart your computer.

Have you used PAE to free your computer from its limited RAM usage? Let us know about your experiences — and any tips that you might have — in the comments section below.

Tuesday 5 September 2017

Mobile Application Maker Software Free Download

BY SMART YOO


mobile application maker software free download,This Is awesome Free mobile app maker software can Create a android app For You With Few Clicks.The mobile application maker software is loaded with various multipurpose templates that you can customize as you wish to make your App
mobile application maker software free download

Mobile Application Maker Software Free Download

DOWNLOAD NOW

Find My iPhone Activation Lock

BY SMART YOO


Find My iPhone includes Activation Lock—a feature that's designed to prevent anyone else from using your iPhone, iPad, iPod touch, or Apple Watch if it's ever lost or stolen. Activation Lock is enabled automatically when you turn on Find My iPhone.
Activation Lock helps you keep your device secure, even if it's in the wrong hands, and can improve your chances of recovering it. Even if you erase your device remotely, Activation Lock can continue to deter anyone from reactivating your device without your permission. All you need to do is keep Find My iPhone turned on, and remember your Apple ID and password. And with watchOS 2 and later, you can use Activation Lock to protect your Apple Watch too.

Here's how it works

When you turn on Find My iPhone on your iPhone, iPad, or iPod touch, your Apple ID is securely stored on Apple’s activation servers and linked to your device. From that point on, your password is required before anyone can turn off Find My iPhone on your device, erase your device, or reactivate and use your device.
Activation Lock is enabled automatically when you set up Find My iPhone.

If your device is lost or stolen

If you ever misplace your device—whether it’s lost or you think it might have been stolen—you should put it into Lost Mode immediately with Find My iPhone.
Lost Mode locks your screen with a passcode and lets you display a custom message with your phone number to help you get it back. You can also remotely erase your device if needed, and your custom message continues to display even after the device is erased.
While Activation Lock works in the background to make it more difficult for someone to use or sell your missing device, Lost Mode clearly indicates to anyone who finds your device that it still belongs to you and can’t be reactivated without your password.
To put a device into Lost Mode, sign in to icloud.com/find from a Mac or PC or use the Find My iPhone iOS app.

If you forget your Apple ID or password

Your Apple ID is the account that you use to sign in to all Apple services. Usually, your Apple ID is your email address. If you forget your Apple ID, we can help you find it.
If you forget your password, you can reset it from your device or your Apple ID account page.
If you can't find your Apple ID or reset your password, you'll lose access to your account and might be unable to use or reactivate your device. To help prevent this, visit your Apple ID account page periodically to review and update your account information.

Check for Activation Lock before you buy a device from someone else

Before you buy an iPhone, iPad, iPod touch, or Apple Watch from someone other than Apple or an authorized Apple reseller, make sure that the device is erased and no longer linked to the previous owner’s account. Ask the seller whether or not they've turned off Activation Lock, then follow these steps:
  1. Turn on the device and slide to unlock.
  2. If the passcode lock screen or the Home screen appears, the device hasn't been erased. Ask the seller to completely erase the device by going to Settings > General > Reset > Erase All Content and Settings. Don't take ownership of any used iPhone, iPad, or iPod touch until it's been erased.
  3. Begin the device setup process.
  4. If you're asked for the previous owner’s Apple ID and password, the device is still linked to their account. Hand the device back to the seller and ask them to enter their password. If the previous owner isn't present, they can remove the device from their account by signing in to icloud.com/find. Don't take ownership of any used iPhone, iPad, or iPod touch until it has been removed from the previous owner’s account.
You will know that a device is ready for you to use when you're asked to "Set up your iPhone," “Set up your iPad," or “Set up your iPod” the first time you turn it on.
If you buy a device that's still linked to a previous owner's account, contact them as soon as possible and ask them to erase the device and remove it from their account. Learn how to remove a device from a previous owner's account.

Before you give away your device or send it in for service

Make sure that you turn off Find My iPhone on your device before you give it away or send it in for repair. Otherwise, your device is locked and anyone that you give the device to can't use it normally and Apple technicians can't perform service repairs. Just sign out of iCloud and then erase all content and settings. This completely erases your device, removes it from your Apple ID, and turns off Find My iPhone.
In iOS 10.3 or later:
  1. Tap Settings > [your name] > iCloud.
  2. Scroll down and tap Sign Out. 
  3. Enter your Apple ID password and tap Turn Off.
  4. Go back to Settings.
  5. Tap General > Reset > Erase All Content and Settings.
In iOS 10.2 or earlier:
  1. Tap Settings > iCloud.
  2. Scroll down and tap Sign Out > Sign Out.
  3. Tap Delete from My iPhone and enter your password
  4. Go back to Settings.
  5. Tap General > Reset > Erase All Content and Settings.
     

Get help with Find My iPhone

BY SMART YOO


Get help when you don't see your device listed, or you see an unexpected device or an alert that says your device is offline. 

I don't see my device in Find My iPhone

Don't see your device on iCloud.com or in the Find My iPhone app? After each of the following instructions, check again:
  • Check that you signed in to iCloud on your device: For iOS 10.3 or later, tap Settings. If you see "Sign in to your [device]," tap it and enter your Apple ID and password. For earlier versions of iOS, tap Settings > iCloud and enter your Apple ID and password.
  • Tap Settings > [your name] > iCloud > Find My iPhone. If Find My iPhone is off, turn it on. Then tap Allow.
  • Check which Apple ID you signed in with. Maybe you signed in to iCloud.com or Find My iPhone with a different Apple ID than on the device that you don't see listed. To check, sign in to Find My iPhone or iCloud.com with your other Apple ID accounts and look for your device.
  • Check that your device has a cellular or Wi-Fi network connection. For example, to locate your Mac or Apple Watch, it must connect to Internet through a known Wi-Fi network (not Ethernet). If you can access your device and see that it has an active Internet connection, turn Airplane Mode on and back off. Still need help? Turn your device off and back on.
  • Tap Settings > General > Date & Time. Check that Set Automatically is on, which automatically sets your date and time based on your time zone.
With the same Apple ID, you can register up to 100 devices for Find My iPhone. If you need to add a device after you registered 100 others, remove a device first.

I see my device in Find My iPhone, but it's offline

Device offline in Find My iPhone
If you see "Offline," "No location available," or "Location Services Off," your device might be offline for one of these reasons:
  • It's powered off, the battery has run out, or more than 24 hours passed since the last location was sent to Apple (if Send Last Location is turned on). When your device is connected to the Internet, you can see the remaining battery in the upper-right corner of the information pane. 
  • Your iPad, iPod touch, Apple Watch, or Mac isn't connected to a known Wi-Fi or data network. Wait a few minutes and try again.
  • You're in a country where we don't offer this feature. This feature might not be available in your country due to technical limitations or local law.
You can still play a sound, send a message, issue a lock request, or start an erase of your iOS device with Find My iPhone. Your device receives the command after you turn on your device and connect to the Internet.
If you contact your wireless service provider to report your device lost or stolen, they might deactivate your SIM card or account. This turns off service for your iPhone and you won't be able to find, play a sound, send a message, issue a lock request, or start an erase of your iOS device with Find My iPhone. However, we'll help you learn how to protect your information.
Your device's last known location is available for one day. If your device is offline or can't connect to Find My iPhone for more than 24 hours, you won't be able to see the last known location.

The location circle is too large to be useful

If your device is still determining a more accurate location, the location circle might be large. Wait a few minutes and refresh the map again. If the location circle remains large, your device might not have access to a Wi-Fi or GPS signal.
Location circle is too large in Find My iPhone

I see a device that I don’t own or use anymore

Before you sell or give away your iPhone, iPad, iPod touchApple Watch, or Mac, sign out of iCloud and erase all content and settings. When you sign out of iCloud from your device, iCloud turns off Find My iPhone and removes the device from your list. 
If your device is currently offline, you can remove it. Go to iCloud.com and click Delete icon to the right of the device name. Or, from the Find My iPhone app on your iOS device, swipe over the device name and tap Remove.
If your device comes back online and Find My iPhone is on, your device automatically reappears in your device list.

My device is linked to a previous owner's account

If you're asked to give a previous owner's Apple ID and password when you set up an iPhone, iPad, or iPod touch, or the passcode when you turn on an Apple Watch, then the device is still linked to their account with Find My iPhone Activation Lock. Contact the previous owner and ask them to turn off Find My iPhone and remove the device from their account.

I can't turn on Find My Mac

If you can't turn on Find My Mac, try these steps:
  1. Go to iCloud System Preferences. If you see "Administrative authorization required," you aren't an administrative user on your Mac. Log out of your account, log back in with an administrative user account, and then try to turn on Find My Mac.
  2. Check to see if your recovery system is up to date. If you see "Recovery system update required" in the iCloud System Preference, you'll need to update your Mac. From the Apple menu, choose Software Update, and make sure you install the Mac OS X Recovery HD Update for your version of OS X.
  3. Make sure the recovery partition on your Mac isn't damaged. Try to verify and repair the partition with Disk Utility.

If your iPhone, iPad, or iPod touch is lost or stolen

BY SMART YOO


If you lose your iPhone, iPad, or iPod touch or think it might be stolen, these steps might help you find it and protect your data.
If Find My iPhone is turned on, you can use it to find your device.

If Find My iPhone is enabled on your missing device

You can use Find My iPhone to find your device and take additional actions that can help you recover it and keep your data safe.
  1. Sign in to icloud.com/find on a Mac or PC, or use the Find My iPhone app on another iPhone, iPad, or iPod touch.
  2. Find your device. Open Find My iPhone, and select a device to view its location on a map. If the device is nearby, you can have it play a sound to help you or someone nearby find it.
  3. Turn on Lost Mode. Using Lost Mode, you can remotely lock your device with a passcode, display a custom message with your phone number on your missing device's Lock screen, and keep track of your device's location. If you added credit or debit cards to Apple Pay, the ability to make payments using Apple Pay on the device is suspended when you put your device in Lost Mode.
  4. Report your lost or stolen device to local law enforcement. Law enforcement might request the serial number of your device. Find your device serial number.
  5. Erase your device. To prevent anyone else from accessing the data on your missing device, you can erase it remotely. When you erase your device, all of your information (including credit or debit cards for Apple Pay) is deleted from the device, and you won't be able to find it using Find My iPhone. After you erase a device, you can't track it. If you remove the device from your account after you erase it, Activation Lock will be turned off. This allows another person to activate and use your device.
  6. Report your lost or stolen device to your wireless carrier, so they can disable your account to prevent calls, texts, and data use. Your device might be covered under your wireless carrier plan.
If you use Family Sharing, any family member can help locate another member’s missing device. Just have your family member sign in to iCloud with their Apple ID, and you can find any device associated with that Family Sharing account.

What if your device is off or offline?

If your missing device is off or offline, you can still put it in Lost Modelock it, or remotely erase it. The next time your device is online, these actions will take effect. If you remove the device from your account while it's offline, any pending actions for the device is cancelled.

How do you turn off or cancel Lost Mode?

You can turn off Lost Mode by entering the passcode on your device. You can also turn off Lost Mode on iCloud.com or from the Find My iPhone app.

If Find My iPhone isn't enabled on your missing device

If you didn't turn on Find My iPhone before your device was lost or stolen, you can't use it to locate your device. However, you can use these steps to help protect your data:
  1. Change your Apple ID password. By changing your Apple ID password you can prevent anyone from accessing your iCloud data or using other services (such as iMessage or iTunes) from your missing device.
  2. Change the passwords for other internet accounts on your device. This could include email accounts, Facebook, or Twitter.
  3. Report your lost or stolen device to local law enforcement. Law enforcement might request the serial number of your device. Find your device serial number.
  4. Report your lost or stolen device to your wireless carrier. Your carrier can disable the account, preventing phone calls, texts, and data use.
Find My iPhone is the only way that you can track or locate a lost or missing device. If Find My iPhone isn't enabled on your device before it goes missing, there is no other Apple service that can find, track, or otherwise flag your device for you.

DOWNLOADS HTC Super Tool Unlocks and Roots Many Popular HTC Devices [Updated]

BY SMART YOO


Owners of popular HTC phones like an Evo, myTouch, G2, and others can now root their phone in just a few simple steps with the HTC Super Tool for Windows.
The tool uses the popular zergRush exploit, which works on a number of HTC phones and can be found in other tools like previously mentionedRevolutionary. With just a few clicks, you can root your phone, get S-OFF, unlock the bootloader, get rid of Sense, and more. You can even unroot by re-running the program. Right now, the device has been tested on the Evo Design 4G, Evo 4G, Evo 3D, Evo Shift, T-Mobile G2, myTouch 3G and 4G, Inspire, Sensation, Incredible, Wildfire S, and Amaze, though it should work on a number more. If you test it with your phone and find that it works, let the developer know over at XDA, and email me at whitson+rootingguide@lifehacker.com so I can add it to the list. We'll be adding this method to our always up-to-date rooting guide as well very soon. Hit the link to check it out.
Update: We weren't able to test this one ourselves, and it looks like a lot of people are having trouble with this program. At the moment, the developer has yet to help anyone with their issues, but it looks like some of the above phones may not actually be supported. We're going to hold off on adding it to the rooting guide for now, but give it a shot if you like (and let us know how it goes. If it doesn't work, check out our preferred methods for rooting these phones instead.
HTC Super Tool | XDA Developers via Android and Me